You wouldn’t buy a brand-new car and then never wash it or change the oil, would you? Keeping your hearing aids in good working condition requires maintenance too. You’ve made a valuable investment in your health—here are some hearing aid care tips on how to protect it.
Read your manual and visit your provider regularly
Read your hearing aid manual and talk to your hearing provider before cleaning your hearing aids on your own, and never do anything to clean your hearing aids that the manual or your provider says not to do. Schedule a visit with your provider at least once every 6–12 months for a thorough cleaning and checkup. If you have problems with wax buildup, you may need to schedule professional hearing aid maintenance more often.
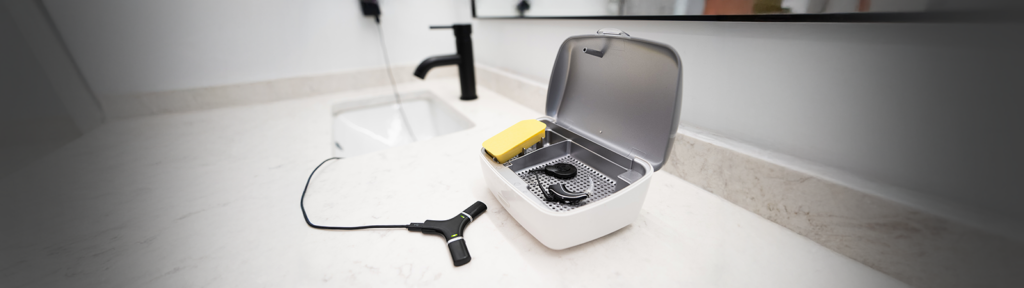
Hearing aid cleaning tools
For regular at-home care, you need the right equipment. The most common tools used for cleaning hearing aids include
- Wax removal brush
- Soft, clean, dry cloth
- Wax pick/wire loop
- Vent cleaner
Hearing aid cleaning kits or multi-tools can be purchased from your hearing provider, online, or in many stores. Other items you can use to care for your hearing aids include
- A soft-bristle child’s toothbrush can be used as a wax removal brush
- Disinfectant wipes can be used instead of a cloth, but only if they are made for hearing aids
- Alcohol-free cleaner can be used for cleaning the earmolds of in-the-ear models, but make sure you use one formulated for hearing aids

Be careful
Some hearing aid parts are delicate, particularly the microphone and the receiver. Careful handling while cleaning will help prevent accidental breakage or damage. If you’re unsure of how to clean your specific hearing aid model, ask your provider to show you. However, here are a few general tips to keep in mind.
- Avoid exposing your hearing aids to water; while water resistant, the internal technology can be damaged by submersion
- Never use chemical solutions or wipes not made for hearing aids
- Never insert anything into the microphone or receiver ports and be careful not to push wax or dirt into the opening
How often to clean your hearing aids
Some cleaning procedures should be done daily, while others may be done weekly.
Daily
Do the following every morning. Morning is best because the hearing aid has had time to dry overnight, making wax and buildup easier to remove.
- Gently brush the microphone cover to remove wax or debris
- Wipe down the entire hearing aid gently with a soft cloth
- When not in use, store your hearing aids in their designated charger or protective case to keep them safe and secure
Weekly
About once a week, spend a little more time carefully removing additional dirt and buildup.
- Use a wax pick/wire loop to gently remove any stubborn deposits or wax buildup; DO NOT use the pick around the microphone or receiver ports
- For models with wax guards, check and replace the wax guard as needed
How to clean your hearing aids
The following tips apply to all hearing aid models and styles.
- Turn the hearing aid upside down while cleaning ports and openings so any debris dislodged will fall out instead of in
- If using zinc-air batteries, open the battery compartment at night to extend the battery life and air out the compartment
- When changing zinc-air batteries, brush the battery compartment clean
- With rechargeable hearing aids, ensure the battery and charging contacts are clean and free of wax or debris
How to clean ITE hearing aids

Follow the steps below to clean in-the-ear (ITE) style hearing aids.
- Gently brush the microphone cover, receiver, and vent openings to remove wax or debris
- Use a wax pick/wire loop to remove stubborn material from the air vent
- For larger vents, run a vent cleaner carefully through the opening in each direction
- Wipe down the entire hearing aid gently with a soft cloth
Caution: Never use water, alcohol, or chemical wipes to clean ITE hearing aids.
For a hands-on demonstration of how to clean ITE hearing aids, watch this video:
How to clean BTE hearing aids

Follow the steps below to clean behind-the-ear (BTE) style hearing aids.
- Gently brush the hearing aid clean
- Remove the earmold from the hook for cleaning
- Brush the earmold clean, then use a wax pick/wire loop to remove any stubborn debris
- Wipe down the hearing aid and earmold gently with a soft cloth
As needed, you can wash the earmold with warm water and soap. Be sure to allow the earmold and tubing to dry completely before reattaching to the hearing aid. DO NOT use chemical cleaners unless they’re specially formulated for earmolds.
Tip: Use a bulb blower to force the water out of the tubing to promote quicker drying.
Click here for more on the care and cleaning of earmolds. For a hands-on demonstration of how to clean BTE hearing aids, watch this video:
How to clean RIC hearing aids

Follow the steps below to clean receiver-in-the-canal (RIC) style hearing aids.
- Gently brush the hearing aid to remove any debris
- Use your thumbs to gently massage the dome tip to push out any stubborn material
- Wipe down the entire hearing aid gently with a soft cloth
Replace the dome when it becomes worn or misshapen or if there’s a buildup or blockage that can’t be removed.
Caution: Never use water, alcohol, or chemical wipes to clean RIC hearing aids. For a hands-on demonstration of how to clean RIC hearing aids, watch this video:
Regular care and cleaning can extend the life of your hearing aids and help keep them in top working condition. For more information on how to care for your hearing aids, visit the care and maintenance section on this site.